Buffering, playback errors, and lag are frustrating in the moment—and confusing when different devices and networks behave differently. The good news is that most streaming problems follow a predictable pattern: network instability, insufficient device resources, incorrect player settings, or corrupted cache/data. With the right checklist, you can usually narrow down the cause quickly and get your video playing smoothly again with gostream.
This supporting guide focuses on one specific intent: troubleshooting buffering, playback errors, and lag during playback. Instead of repeating generic “restart your router” advice, you’ll follow targeted steps that match the symptoms you see on screen, plus the most common underlying causes that create those symptoms. Use it alongside your broader streaming guide so you can move from diagnosis to fix faster.
Start With Symptom Matching: Buffering vs Playback Errors vs Lag
Before changing settings, identify what kind of failure you’re experiencing. Buffering usually looks like pauses or spinning/buffering indicators that come and go. Playback errors are often more explicit—messages like “cannot play,” “error code,” “playback failed,” or a stream that never starts. Lag typically feels like delayed video/audio, skipped frames, or choppy playback even when the stream appears “connected.”
Because these symptoms map to different root causes, symptom matching saves time. For example, frequent buffering often points to bandwidth or network volatility, while playback errors can indicate codec/format mismatch, expired sessions, or corrupted cached data. Meanwhile, lag is often tied to device performance, decoding capacity, or an overloaded Wi‑Fi environment.
As you read the sections below, keep returning to your specific symptom. That helps you avoid “fixes” that don’t address the real problem.
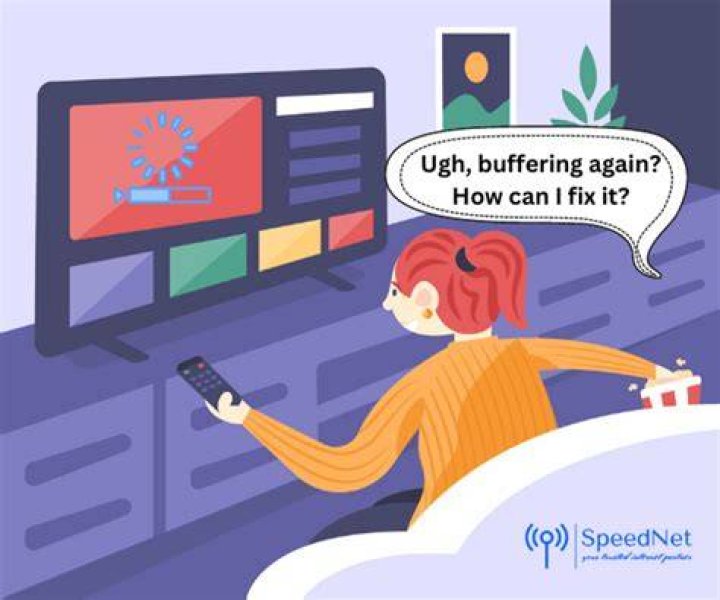
Fix Buffering by Stabilizing Bandwidth and Reducing Network Variability
Buffering is rarely caused by a single setting. More often, it’s the result of unstable throughput—your connection may be “fast enough” at times, but it dips during the moment the player tries to fill its buffer. That’s why two minutes of smooth playback can flip into repeated pauses.
Start with the simplest signal test: try another app or website that uses streaming (like a different video platform) at the same time. If everything buffers, your network is likely the bottleneck. If only gostream buffers, the issue may be app settings, cached data, or a connection path that affects that specific stream.
Run a quick Wi‑Fi reality check, not just a speed test
Speed tests measure peak bandwidth, but streaming depends on consistency. If possible, move closer to the router and test again. If buffering improves near the router, your Wi‑Fi signal strength or interference is the likely culprit.
Also check whether other devices are actively using bandwidth (cloud backups, large downloads, online gaming updates). Even if your internet “plan” is fast, background traffic can steal the stable throughput streaming needs.
Switch from Wi‑Fi to Ethernet when accuracy matters
If you’re diagnosing stubborn buffering, Ethernet is the most decisive move. A wired connection reduces interference and usually improves buffer stability. If playback becomes smooth on Ethernet, you’ve confirmed the problem is network variability rather than the device or the stream itself.
Use the right Wi‑Fi band and reduce interference
Many routers broadcast both 2.4 GHz and 5 GHz. 2.4 GHz reaches farther but is slower and more crowded; 5 GHz is faster and often better for streaming when you have enough signal. If you see improvement on one band, stick with that band for playback.
Physical obstacles also matter. Walls, floors, and metal objects can degrade signal quality. For consistent performance, place the router more centrally and avoid stacking it behind televisions or inside enclosed cabinets.
Restart the right components in the right order
A common mistake is restarting devices in a way that doesn’t clear network instability. If your router supports it, power-cycle the router and modem first, wait until lights stabilize, then reopen your streaming app. Finally, reboot the device only if the buffering pattern continues.
This order matters because the device will often reconnect to the network with a new session only after the network side has fully stabilized.
Resolve Playback Errors by Clearing Corrupt Cache and Updating Player Data
Playback errors often mean the player cannot properly initialize the stream. That can happen when cached files are corrupted, authentication/session tokens expire, the app/player version is outdated, or the device has trouble decoding the stream format.
Even if the error message is vague, the fix path is usually the same: clear local app data/cached files, refresh the player session, and confirm your app is up to date. Then retest in a clean environment.
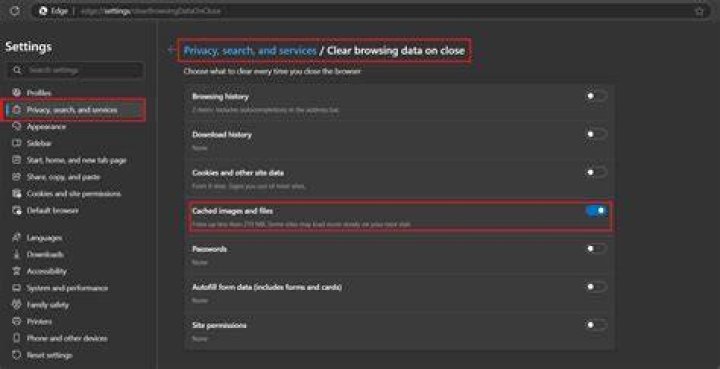
Clear cache and restart the streaming session
On most devices, clearing cache removes corrupted temporary data that can break playback. After clearing cache, close the app completely, reopen it, and try starting the same video again. If the error changes or the video starts normally, you’ve likely eliminated a local data issue.
If the device supports “force stop,” use it before reopening. The goal is to ensure the player creates a fresh stream session rather than resuming from a broken state.
Update gostream and the device OS to avoid decoder mismatches
Outdated app versions can include streaming-related bugs or outdated player components. Similarly, outdated device OS builds may lack improvements that help decoding and playback stability.
Check for updates and install them, then restart the device. After updating, test again with a short video first. If short videos play but long ones fail, focus on buffering stability and resource constraints rather than app installation.
Try a different network path to confirm stream-session issues
If playback errors persist on your home network, test on a different network (for example, mobile hotspot). If playback works on the alternate network, your original path likely causes session or connectivity problems. If playback fails on both, the issue is more likely local—cache, app version, browser/player compatibility, or device capability.
Fix Lag by Matching Video Decoding Needs to Device and Display Performance
Lag is different from buffering. Buffering means the player can’t fill the buffer fast enough, while lag usually means the device cannot decode/render frames smoothly in real time. The result is delayed playback, choppiness, audio-video sync issues, or frequent frame drops.
Because lag is tied to performance, you’ll want to reduce load on the device and verify that the streaming settings match what the device can handle.
Lower playback quality to reduce decoding load
If your player allows manual quality selection, choose a lower bitrate/quality mode. Higher quality requires more decoding power and sustained bandwidth. When lag disappears at a lower setting, your original quality likely exceeded the device’s real-time decoding capacity.
Even if your internet is “fast,” CPU/GPU constraints can still cause lag—especially on older smart TVs, budget phones, or devices with limited hardware decoding.
Close background apps and free system resources
Background tasks can compete for CPU, GPU, and memory. Close apps you aren’t using, pause downloads, and avoid heavy multitasking during playback. If you notice the lag improves after closing apps, you’ve confirmed a resource contention issue.
For tablets and phones, also disable battery saver or power-saving modes during playback if the device allows it. Power-saving can reduce performance and cause decoding lag.
Check peripherals that can add latency
If you’re using Bluetooth headphones, game controllers, or screen mirroring, those can introduce additional latency or sync drift. For troubleshooting, test with built-in speakers or a wired audio connection if available, then retest your playback.
Similarly, if you’re casting to a TV, test whether lag appears on the source device or only on the TV. That distinction can separate “casting pipeline” problems from “local decoding” problems.
Optimize Streaming Settings Without Overcomplicating the Fix
Many users want a single “best” configuration. In practice, you want settings that match your environment. Your goal is stable playback with minimal rebuffering and smooth decoding—rather than always forcing maximum resolution.
Use a systematic approach: change one variable, test, then move to the next. That keeps troubleshooting clean and prevents you from guessing.
Use automatic quality only if your network is stable
Adaptive bitrate streaming can help when your network varies, but it can also struggle if the network oscillates quickly. If you see buffering spikes and quality switching frequently, consider manually selecting a moderate quality. Once stable, you can try returning to automatic if desired.
If your player offers advanced options like “hardware acceleration,” enabling it can improve decoding performance on compatible devices. If you recently changed hardware-related settings, test both states to see which produces smoother playback.
Verify subtitle/audio settings when playback errors mention media tracks
Some playback errors relate to selecting a particular audio track, subtitle language, or format. If you changed subtitles or switched languages right before the error, try reverting to default audio and turning subtitles off temporarily. If playback stabilizes, you’ve narrowed the cause to media track handling.
This is especially helpful when the error appears only for specific videos or specific languages.
Use a Practical Testing Plan to Confirm the Real Cause
Random trial-and-error wastes time. Instead, use a short testing plan that quickly separates “network,” “app/data,” and “device performance” issues.
- Step 1: Test a short video on gostream over the same connection. If it plays smoothly, the app and decoder are likely functional.
- Step 2: Test a longer video. If buffering ramps up later, the network may be unstable over sustained time or the player buffer is too small for your conditions.
- Step 3: Clear cache and retry the same video. If playback errors disappear, corrupted cached data was the trigger.
- Step 4: Lower quality to a moderate level. If lag resolves, your device is likely decoding-limited.
- Step 5: Test on a different network (like hotspot). If behavior changes, focus on your original network path.
If you complete those steps and the problem remains identical across networks and after cache clearing, the next likely factors are device capability, browser/player compatibility (if applicable), or a persistent account/session issue. In that case, you’ll typically need deeper app-level troubleshooting or to contact support from the service side.
When to Stop Troubleshooting and Escalate
Sometimes the issue isn’t on your side. If many videos fail with the same playback error at the same time across different networks and devices, it can indicate a server-side outage, streaming endpoint issue, or account-related permissions problem. In that situation, the best move is to pause troubleshooting and wait a short period, then retest.
Also escalate if you repeatedly see the same error code after cache clearing and updates. Document what you changed (quality setting, network type, device model, approximate times) so that any support team can reproduce the issue quickly.
Final Thoughts
Buffering, playback errors, and lag each point to different underlying causes, so the fastest fixes come from symptom matching and targeted steps. By stabilizing your network, clearing corrupted playback data, and aligning playback quality with your device’s decoding ability, you can usually restore smooth playback without endless guesswork. If you’re using gostream, treat these checks as your reliable troubleshooting path—start with the simplest tests, then move deeper only when the evidence suggests it.
Keep Learning
